
DIY: Fabric Garland
Remember the fabric garland I was making for our cookie table?
To refresh your memory, this is the photo that was the full inspiration behind my garland:
 image via The Sweetest Occasion / design by SHEPAPERIE + Design Boutique / photo by Jeanna Hayes
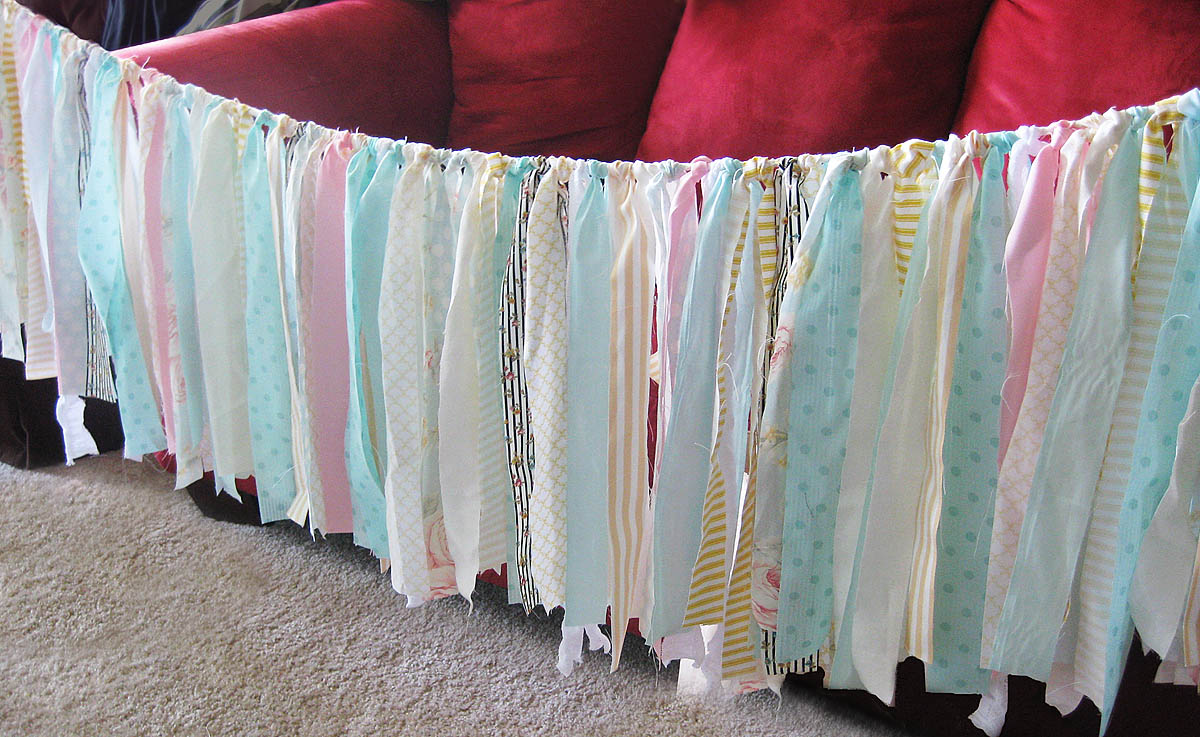
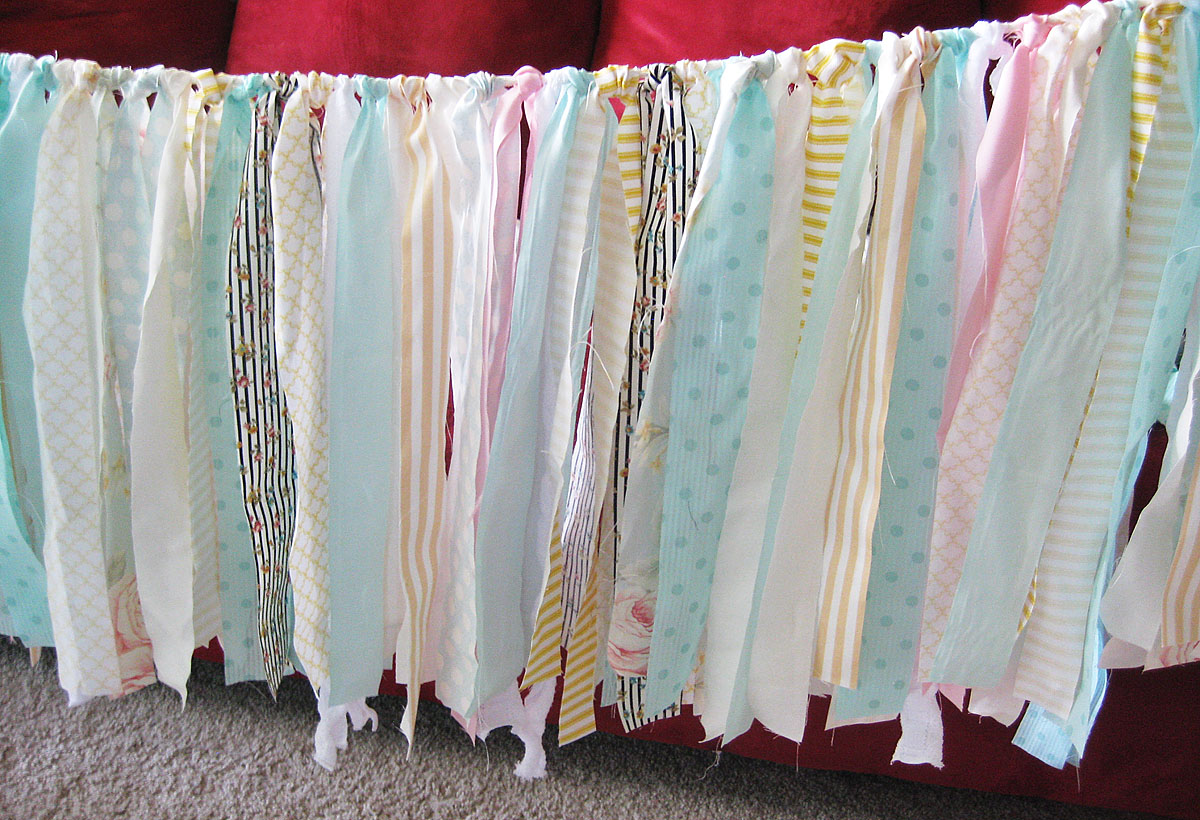
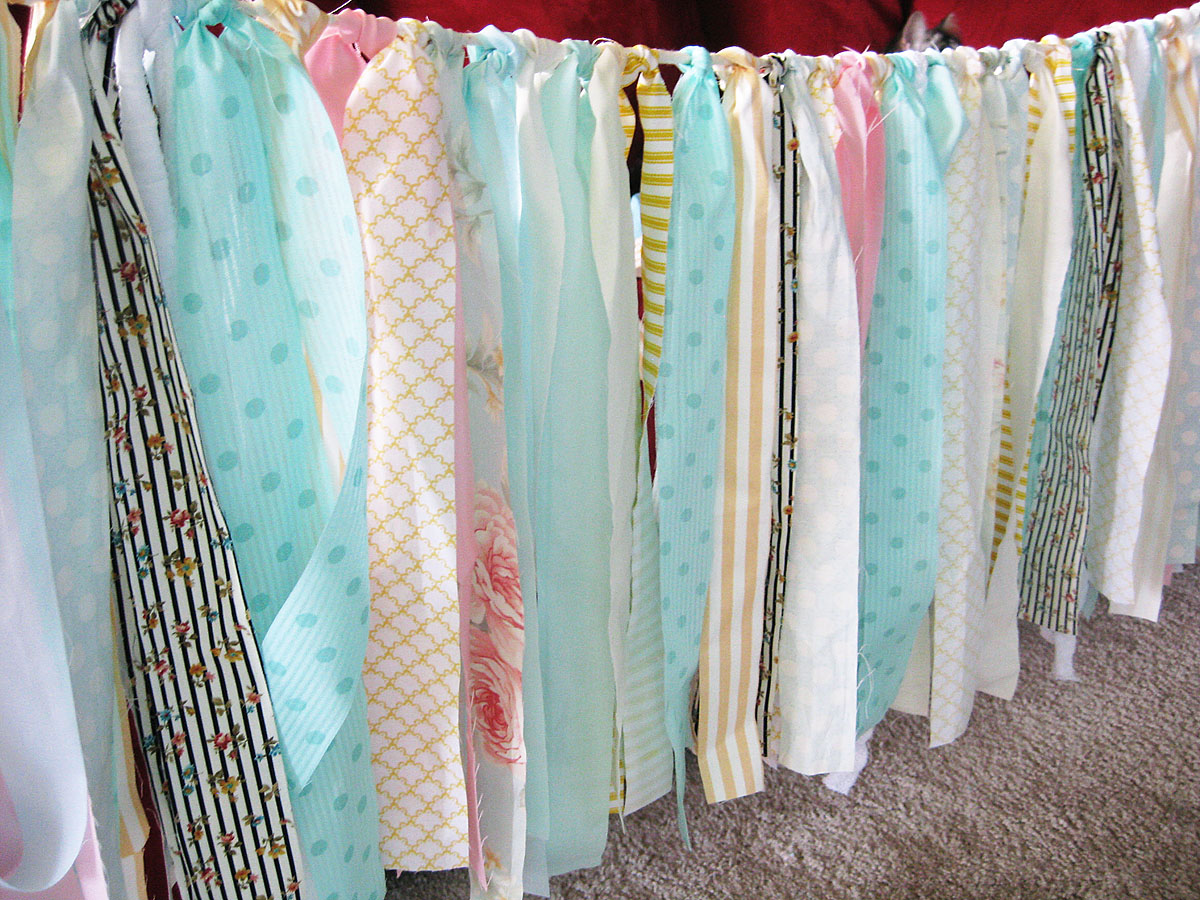
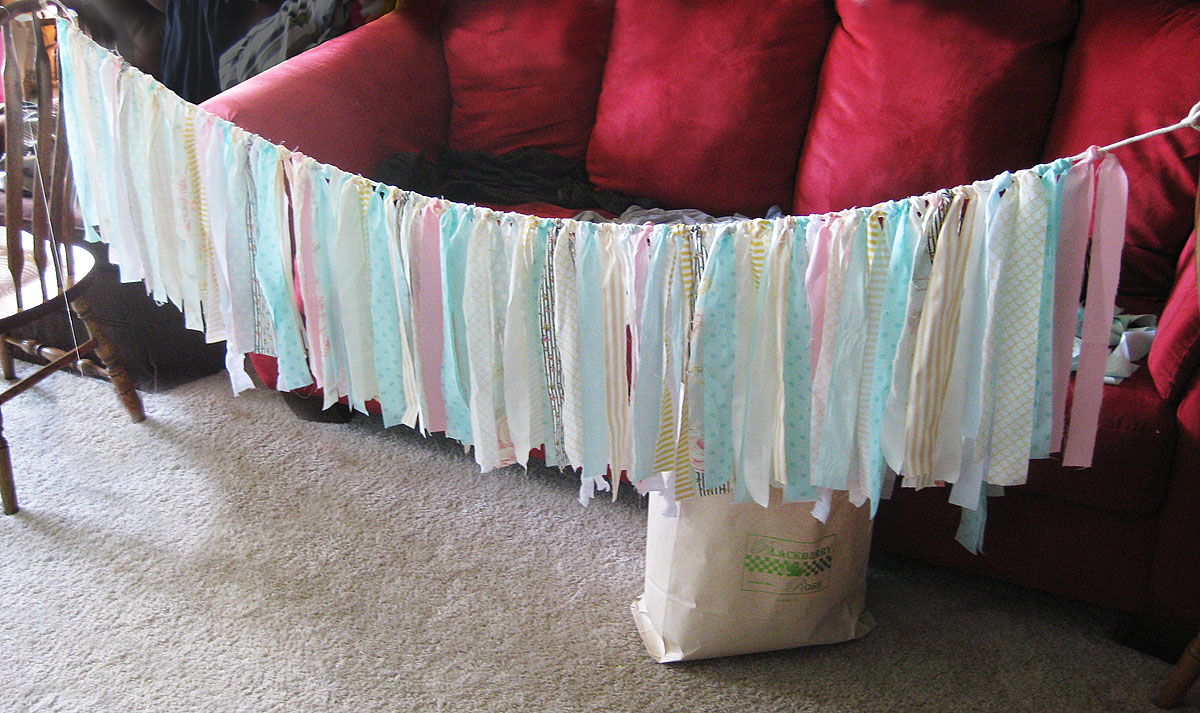
My version of the garland is coming together very, very nicely. I bought fabric in a variety of coordinating colors and patterns, and if you stick to the stuff that’s on sale or in the bargain area then this makes for a very cheap and very chic DIY project. Just be careful you don’t accidentally pick out any $20/yd fabrics like I did…
With the help of a rotary blade, self-healing mat, and my Grandpa & mom, we had the fabric cut into 36″ strips of fabric (they’ll be doubled over when tied) that were either 1″ or 1.5″ wide in no time.
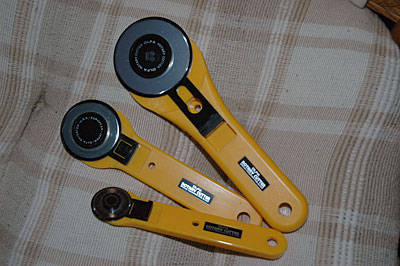 image via About.com
I wanted to leave the edges unhemmed for a softer look and I wasn’t as concerned with having the widths be one-hundred percent perfect, so between the three of us we created an assembly line and finished the cutting job within 30 minutes.
That was the hardest part, and even that wasn’t very hard (except for a few mathematical calculations so we utilized close to the full amount of fabric). I found some natural-looking alternatives to your typical thick, twisted rope at our local fabric store, so I bought 11 feet to hang over our 6 foot cookie table.
I thought the assembly part would take some time, but after setting up in front of the tv I was surprised to find the garland finished within one day. It honestly only took 2-3 episodes of Xena: Warrior Princess. (I love you, Lucy!)
The best thing about this project is that the strips are simply tied on, so it’s very easy to move, remove, and add strips.
personal photo
personal photo
personal photo
personal photo
personal photo
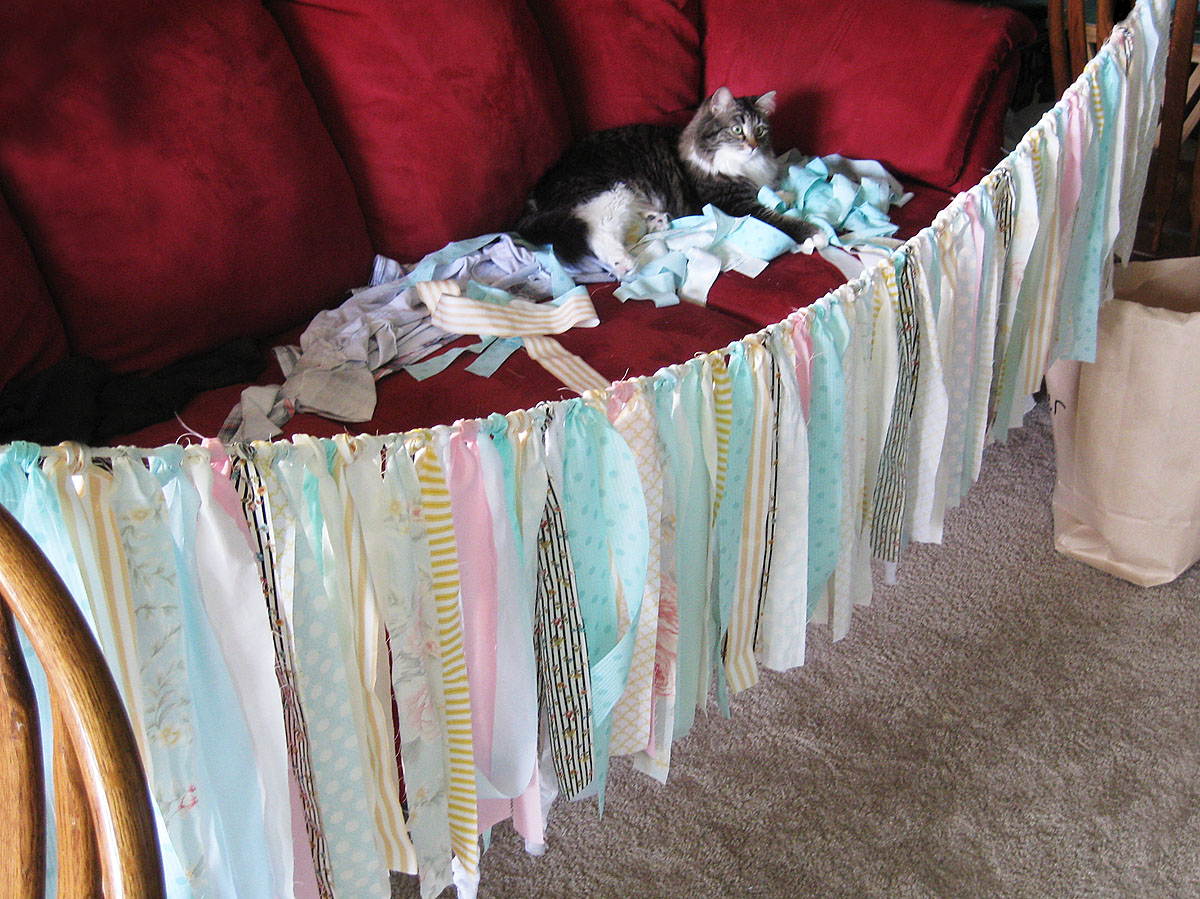
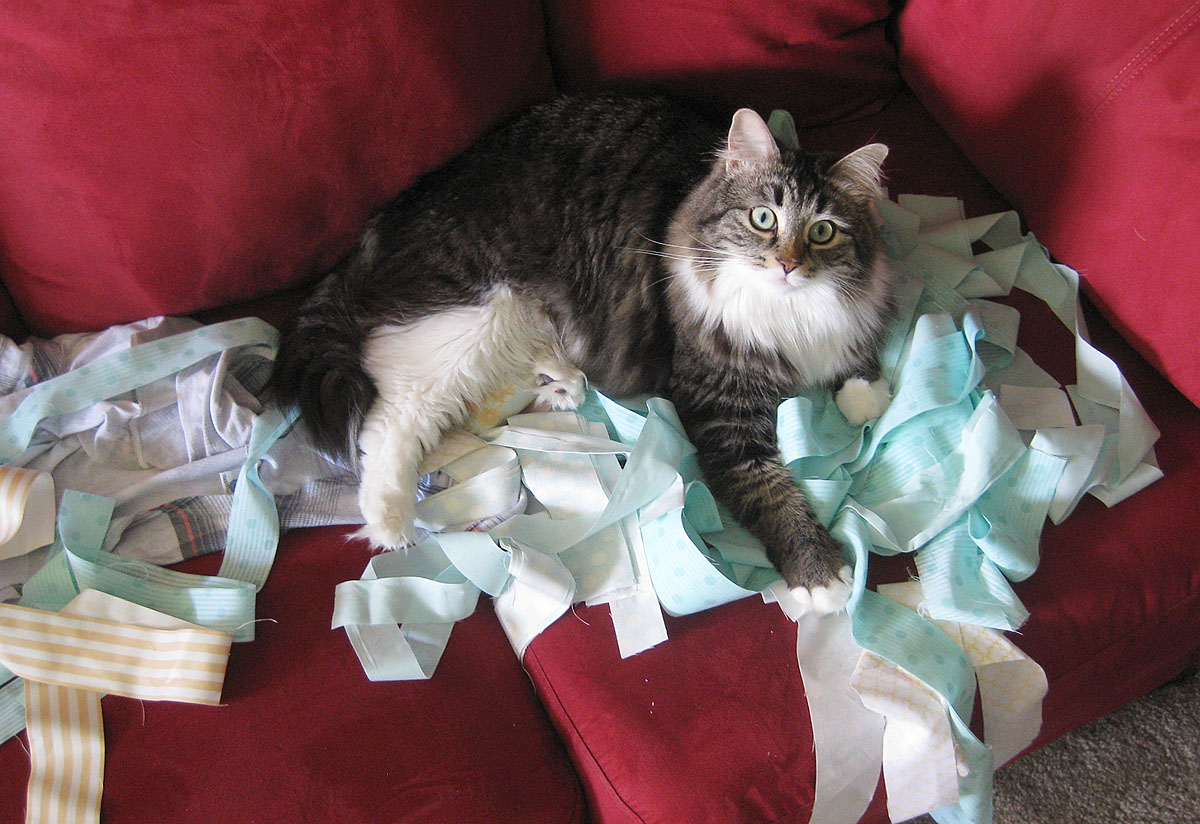
My kitty, Zoey, wanted to help me with the garland. Like most felines, her idea of “helping” is to lay on whatever you’re actively working on.
personal photo
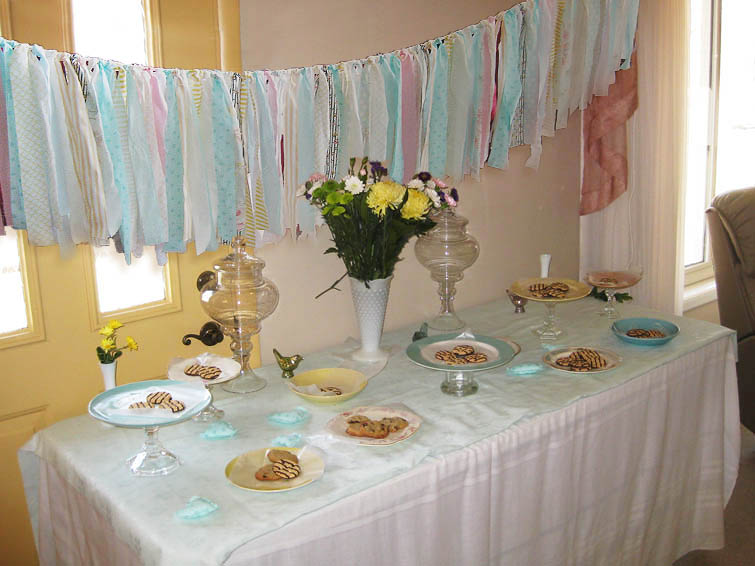
I’m still debating whether I want to keep the pink strips in. I’ll have to set it up with the plates and platters we have to see if the pink becomes an eyesore. And because I don’t have access to those plates right now, I Photoshop’d the garland in to our mock-up photo to get an idea. Kinda neat, huh?
personal photo
I even have enough fabric left over to make a second one to hang above our punch table. Now I just have to make a nice sign to hang in the center of the garlands. I haven’t decided what I want it to say yet, but I was thinking somewhere along the lines of “Love, Sweet, Love”. Any ideas?
Did any of your DIY projects turn out to be easier than expected?
Second-guessing
Second-guessing. This is something I’m very familiar with. I have a hard time committing to a decision without mulling it over properly, and by properly I mean for a looong time. I also have trouble with a degree of “greener grass” mentality. Not in a way that makes me envious of something else, but in a way that always has me thinking, “but there could be something better if I just keep looking!” Let’s call this the “just around the riverbend” mentality, in honor of Pocahontas. Because honestly, there really could be anything, even something better, around that next riverbend.

art by disney, the rest by yours truly
I have had the Riverbends for the majority of my wedding planning decisions. Yes, I even get that crazed look. There’s always one more I can look at, just to be absolutely positively certain that this one is the best one. This applies to cake designs, dresses, colors, centerpiece choices, flowers, and most importantly, vendors. You would think that my obsessive “just one more” habit would make sure that I always end up satisfied, right? I would think so, too, as that would be, oh, I don’t know, logical. Well, this isn’t always so.
Granted, I usually do end up completely satisfied with my decision, but I often go through that awful heart-wrenching, throat-tightening, and mind-numbing phase of doubt. Did I choose the right dress? Are these the colors I really want? Will this look dumb? Is he the best DJ? Does this venue fit with the style I’m going for?
I know many of you must have asked yourself the same questions at some point. It’s awful, right? I’ve second-guessed just about every major decision I’ve made at one point or another. And for a few days, or even a few weeks, I’d be writhing in my skin because I couldn’t figure out if I had made the best choice or not. It really does seem petty now, especially when you think about it rationally. Are blue table linens instead of purple table linens going to be the end of the world? No. And it certainly isn’t going to be the end of the wedding, either. But for some reason, during those moments, the pressure weighs heavy. I guess when we’re planning so many aspects and have so many tasks, it’s easy to get caught up in the details.
So what does Miss Bunting do when she starts wondering if it’s too late to change her mind? Well, if it’s possible, she does change her mind. Not hours after we had placed our order for the groomsmen pants, we had to turn the car right back around and change the color. And by ‘we’, I mean mainly me. It may be silly, but I felt much better with my second decision because in my gut, I knew the original pick didn’t suit (why hello pun) the look we wanted.
This is not always an option, though, especially when it comes to decisions that involve losing large amounts of money. Like, dresses, or venues, for instance. I admit that I went through the second-guessing phase for both of these. When we first made the commitment, I was pleased and excited. Then, at some undetermined amount of time later (perhaps weeks.. perhaps months), I felt those pangs of doubt and panic. There was no way I was buying another dress, and we had already put down deposits on the venues, so I fought with my inner anxiety and tried to convince myself everything was perfect. In times like this, sometimes the best solution is to try to forget about it for several days and give your mind a breather, then re-visit the venue or put the dress back on with your best buddie in tow. With their positive support and a fresh outlook you could very well remember why you loved it in the first place. Fortunately for me, this works wonders. Sometimes being away from something leaves too much to the imagination, and you can start to question what was so great about it to begin with. But when you can see it again in person, touch it, feel it, discuss what will hang where and so forth… well, that could be the best reassurance that yes, you did make the right choice.
Who else has experienced times of doubt or regret during the planning process? How did you overcome it?
Gifts for the Ladies
Before I go any further…. Bunting Bridesmaids, I love you, but this post isn’t for your eyes!
Creative altar spaces
I’m a sucker for pretty installation art pieces, and what better place for such a compositional experience than the very space where you say your wedding vows. This is the space that everyone’s undivided attention will turn to during the ceremony, and I love it when a bride takes it to the next level. I understand how some brides may not want to detract from themselves as they recite their vows, but as long as there aren’t spinning rockets and flashing lights attached to the altar, then the space can be used to enhance the experience by framing the couple. And hey, if you’re a nervous bride and you want to be out of the spotlight so you can fumble through your vows (oh how I hope this won’t be me) then maybe the spinning rockets aren’t a bad idea…
Simply put, creative and colorful ceremony spaces rock my world.
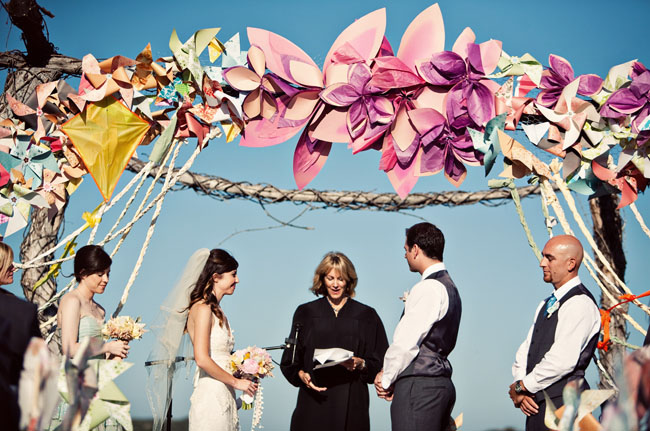 image via Green Wedding Shoes / photo by Ashley Rose Photography
Some of you may have seen this arch made by the bride using paper flowers and pinwheels. I would have loved to be there to see this.
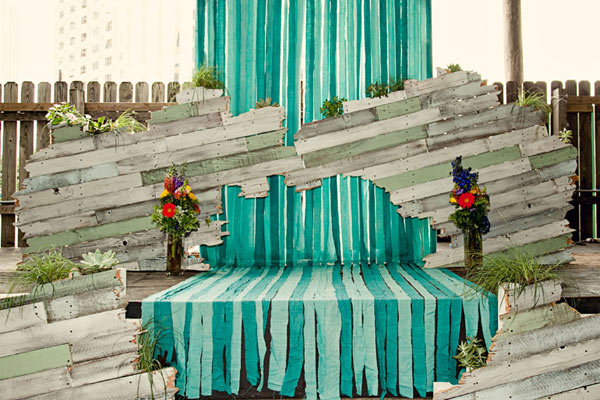 image via Ruffled / photo by Katherine O’Brien
This bride’s brother made an entire wedding stage from upcycled fence boards for her wedding. Don’t you just want to dive into that photo and prance across the stage? I certainly do!
But don’t get me wrong, there are some very pretty altar spaces that take a more minimalistic approach. Even a simple banner or garland adds a delicately romantic touch to the space.
 image via Ruffled / photo by Jamie Delaine
I just keep going back to the color, though!
 image via Offbeat Bride / photo by xatomicbettiex
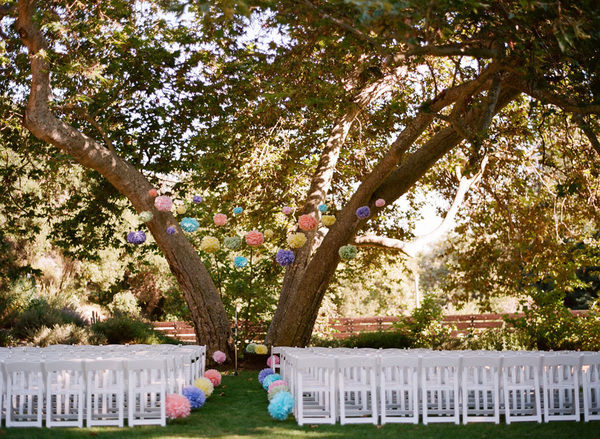 image via Style Me Pretty / design by Bash, Please / photo by Raya Carlisle
I’ve talked about my love for suspended things, so it’s no wonder that I love the colorful hanging tissue poms at the altar like in this last photo. We won’t be having tissue poms lining the aisle, but we will most definitely have them hanging from the trellis at our park. Now if only I could transplant a great tree to hang multiple window panes and buntings from…
The exception to altar decor is, of course, if your ceremony location is so amazingly beautiful it speaks for itself. Like this intimate wedding on the bluffs.
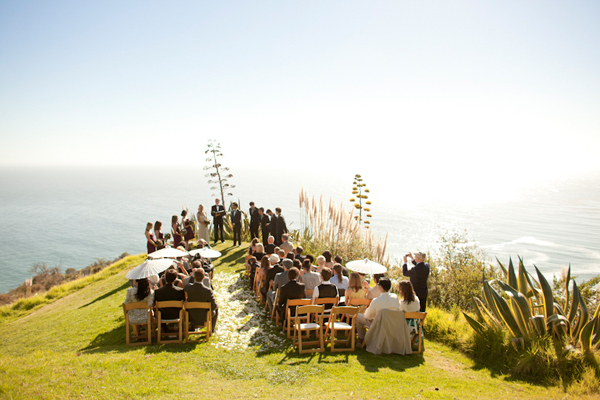 image via Once Wed / photo by Allyson Magda
If you can go cliff-diving or step into a waterfall from the altar, you probably don’t need to add anything else except for your gorgeous self. The same goes for locations with epic architecture.
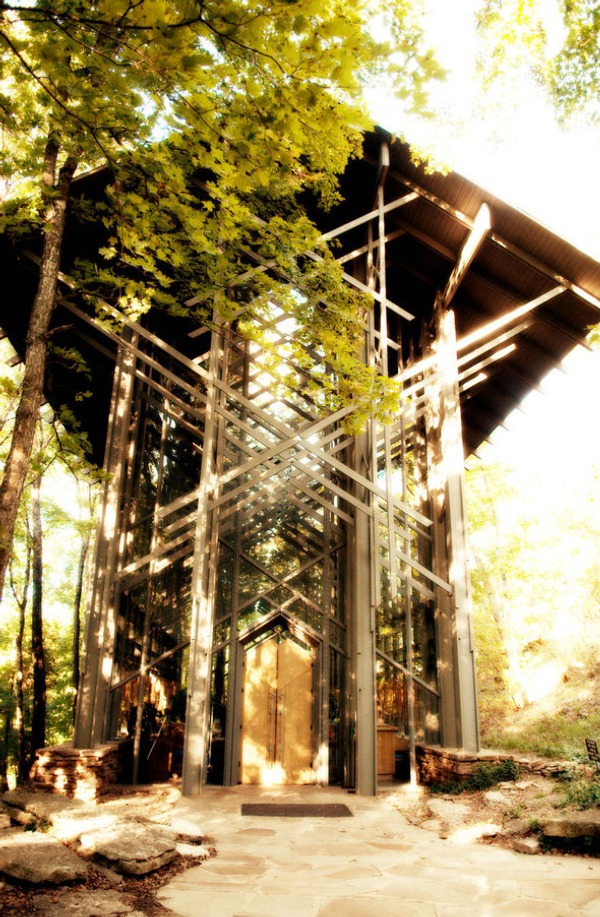 image via Style Me Pretty / photo by Hudson Photography
Oh who am I kidding, every place could use some bunting! Yes, I may be biased.
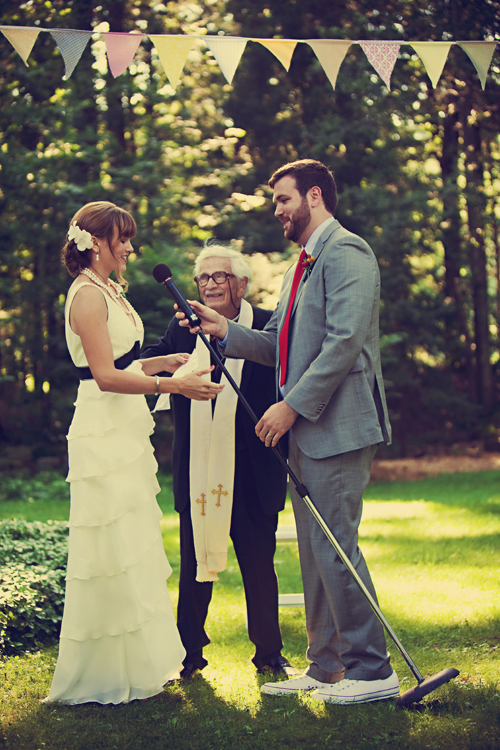 image via Elizabeth Anne Designs / photo by Our Labor of Love
What are your plans for the altar space? Are you going for simple and delicate or bold and colorful?
DIY: How to fake a cake stand
Or…. how to make your own cake stand if your cake is too dang big for a glass or ceramic one.
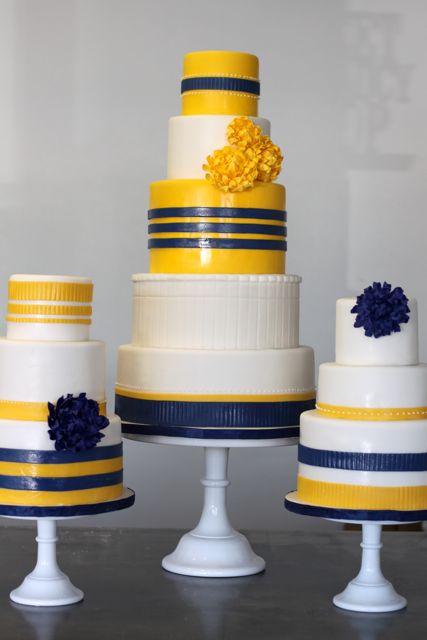 image via My Sweet and Saucy
Among the many things I love, I would like to officially add pedestal cake stands. Especially those of the milk glass variety, yes siree. And though they can be a bit pricey, they elevate your cake with such visual oompf that they are so worth it. Regardless of whether you’re dishing out a lot or a little dough*, adding a pedestal cake stand always seems to make it cry, “look at how beautiful I am!” I bet you didn’t know that cakes could talk, but that is exactly what any cake would say if it had such a throne.
(*haha, silly cake pun)
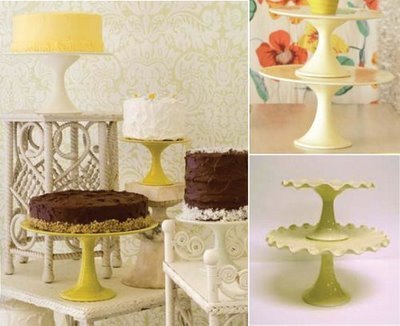
image via Pot Luck Studios
When we booked our cake vendor, I mentioned that I really wanted to incorporate a pedestal for our cake. I was told that I would need a stand that is at least 16″ in diameter, preferably 18″, so that our cake base would have enough stand to sit upon. So off I went on my merry way to find the perfect stand. I searched thrift stores. I searched antique stores. I searched online. I searched ALL OVER and could not, for the life of me, find any sort of ceramic or glass stand that was large enough, let alone made of milk glass. I’m convinced they don’t exist. (I later learned from our cake lady that glass or ceramic may be too fragile for 20-30lb cakes at this size, so keep this in mind if you’re having a full cake) And while Etsy has some beautiful handmade ceramic stands, they were all way out of my budget. This is where you call me a hypocrite, because I just finished telling you they were worth the price. Okay, I take that part back.
But they ARE worth finding a way to DIY, and Mama Bunting had just the solution. She found a large wooden pedestal at a thrift store and thought, “Hey, this is pretty neat!” And neat it was, but the top was nowhere near large enough for anything more than a cupcake. So then she thought, “Hey, why don’t we attach a lazy susan to it?” BRILLIANT. Lazy susans are pretty easy to find, so we picked up a cheap one and then set Daddy Bunting to work on the project.
Unfortunately I forgot to ask Daddy Bunting to take progress photos, but with the help of online photos and my “after” photos you’ll be able to get the idea.
What you’ll need:
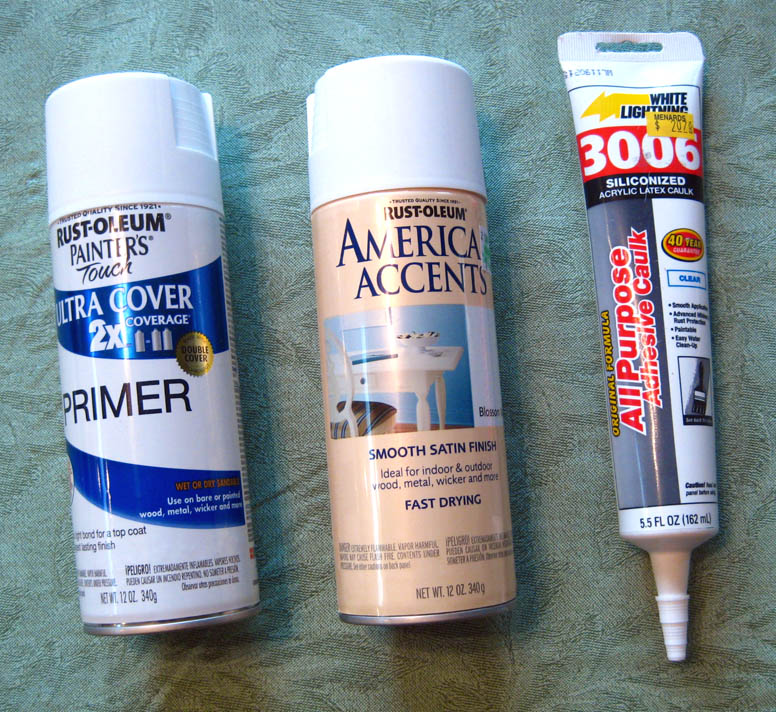
personal photo
- lazy susan
- wooden pedestal base
- ruler and pencil
- countersunk screw and drill
- All Purpose Adhesive Caulk (make sure that it is also paintable)
- primer spray paint
- spray paint in color of choice
Step 1:
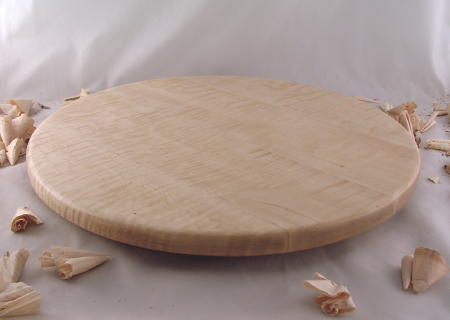 image via Quality Butcher Blocks
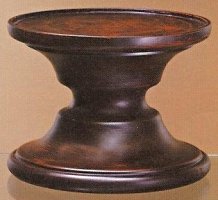 image via The Bridal Shop
Acquire a wooden pedestal and lazy susan. Try searching for the pedestal at your local thrift stores and home & decor departments. Make sure the pedestal is sturdy enough to support a cake, which may weigh a lot. (If you’re still unsure, better to be safe and ask your cake caterer than be sorry and have a tipsy tragedy.) Lazy susans can be found at most department stores, or places like Target and Bed Bath & Beyond.
Step 2:
 image via Kitchen Fantasy
Remove the spinning underpart of the lazy susan so you have the large, flat circle. This should only take a screwdriver, though it will depend on the type of lazy susan you get. Prep your pedestal if you need to as well. We had to saw off a small candleholder/knob on the top of ours to get a flat top.
Step 3:
personal photo
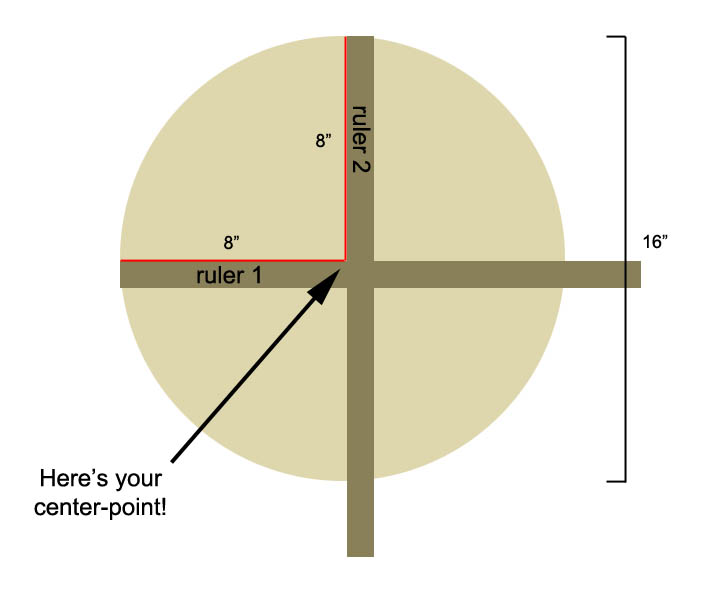
Using two rulers positioned in a cross, find the center of the lazy susan and mark it with a pencil on the TOP of the surface (note: if you have a different technique for finding the center, by all means go for it!). This is where you’ll drill a screw into the top circle to secure it to the pedestal. Don’t forget to double-check that your center-point is indeed at the center by confirming that all distances are the same from center to edge no matter how you rotate the ruler. Don’t worry if it’s off just a tad, as long as it looks centered no one is going to be taking a rule to it. Or will they….? No, no, just kidding, there’s going to be a cake on top, remember?
Now flip over the lazy susan and place the pedestal facedown on top of the susan, so you have a cake stand that is upside-down. Take some time re-position the pedestal until it is centered. This is key to making a cake stand that is well-balanced and sturdy, so take your time. Once you’ve got it shifted right, trace around the diameter with a pencil so you have an outlined guide drawn on the bottom of lazy susan.
Step 4:
It’s caulking time! With your adhesive caulk, draw a line around the perimeter of the pedestal base that will be attached to the lazy susan. Now flip it over caulk-side down, position it to fit within your drawn outline (on the underside of the lazy susan), and press down! Use enough pressure to get the pedestal flush with the susan.
Step 5:
Carefully flip over the cake stand so it’s right-side up. It’s starting to look like something now, isn’t it? But the caulk won’t be enough to hold the two together, so we’ll attach them using a countersunk screw. Countersinking will allow you to drill from the top of the lazy susan while still maintaining a flat surface for your cake. Using the center-point you marked with a pencil, drill your pilot hole through both the lazy susan and pedestal base, then follow by drilling the countersunk screw until it is flush with the surface.
Step 6:

gap-free! / personal photo
You’ll probably notice that there’s a gap between the pedestal base and the lazy susan piece, but that’s easy to fix. Flipping the stand so it’s upside-down again, take your caulk and draw a very thin line around the perimeter of where the two pieces are attached. Now smear this into any gaps, and wipe away the excess for a clean finish. We used our fingers, but you can use something else if you don’t want to get that dirty.
Take this time to dab a little bit of caulk or wood putty in the divet where the screwhead is on the top. Again, wipe away any excess. Once it’s had time to dry, you can even sand away any excess residue if needed.
Step 7:
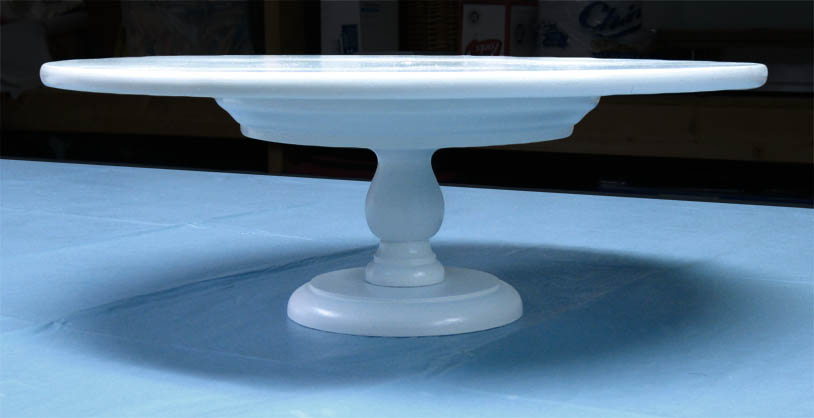
After letting the caulk sit for the appropriate time, prime the entire piece by following the instructions on the can. We did a few coats of primer to make sure it was evenly covered.
You’ll have to wait for each coat to dry before moving on, but once it’s all primed it’s time to paint! We used a semi-satin finish white spray paint to give a nice, finished look. It may be no hobnail Fenton, but it will certainly get the job done!
personal photo
Did anyone else find a way to incorporate a cake pedestal without reducing the size of the cake drastically?
A sweet tooth for sweet dessert tables
Dessert tables make me drool, and not just because they’re filled with all kinds of sweets and treats. They’ve been catching on a lot lately, and it’s perfect for those who want an alternative to the traditional wedding cake or just an additional dessert bar. They would also be amazing at a bridal shower or really any type of party. Pretty much you can come up with whatever reason you want, and I will be all over it.
Just check out some of these arrangements and you’ll understand why:
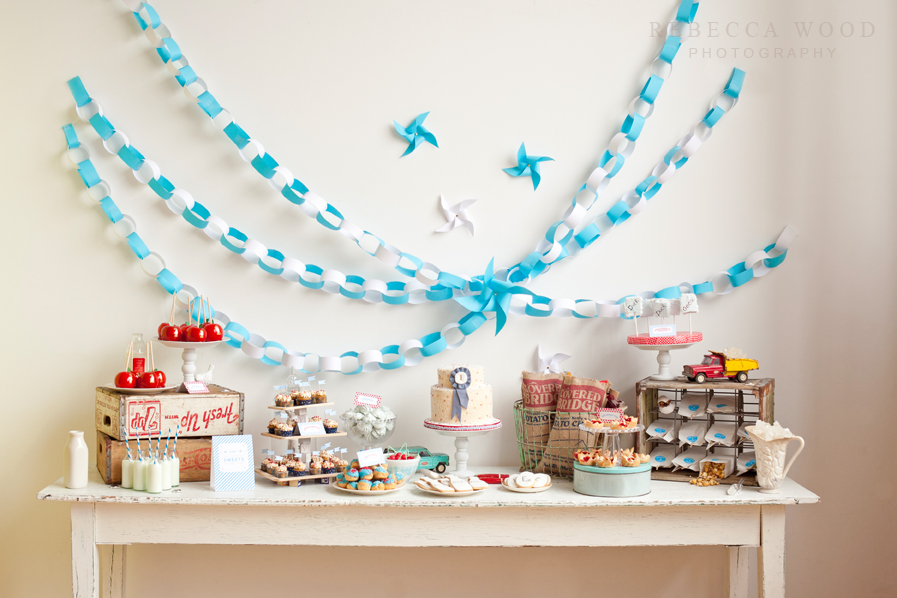 image via The Caketress / design by Lori Hutchinson / photo by Rebecca Wood
 image via Wedding Chicks / design by Grandes Fetes / photo by Jessica Schilling Photography
 image via Catch My Party
 photo by Kelly Chau Photography
Yummy, yummy, yummy!
We’re going to be having a dessert table of our own at the park following our ceremony so that our guests can enjoy the park and a snack before heading to the reception. Because we have limited helpers and to keep things simple for us in the short amount of time it will be up, we’ll only be serving cookies and lemonade. Only. Shame on me. I shouldn’t say ‘only’, because it belittles it. Our dessert table may not have elaborate macaroon trees and cakes and lollipops, but it WILL have an old door, re-purposed china, and saltwater taffy! And cookies, of course.
image via The Sweetest Occasion / design by SHEPAPERIE + Design Boutique / photo by Jeanna Hayes
This has to be my favorite dessert bar I’ve come across, and it’s the main source of inspiration for my own table design. I just love how colorful and playful it is!
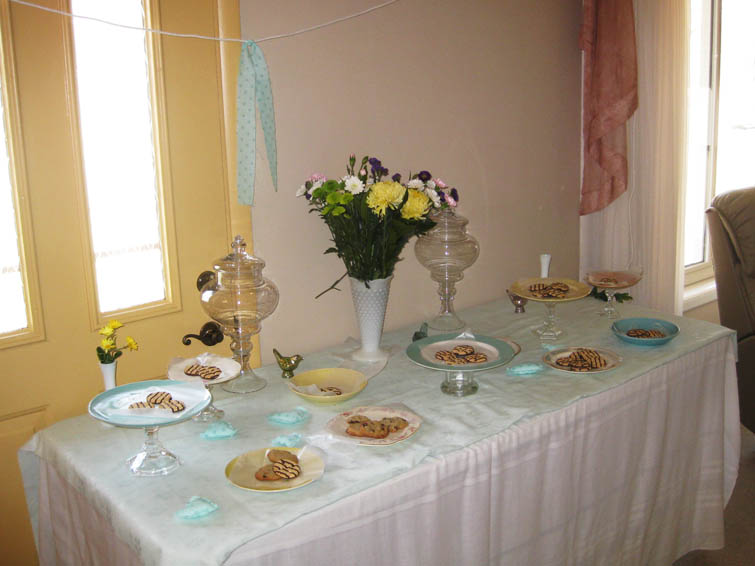
I’m in the process of creating a fabric garland, and I’ve already acquired two apothecary jars of similar structure. Here’s the mock-up my mom and I came up with:
personal photo
We didn’t have everything on hand, so we had to make substitutes, but it gives the general idea (the lone piece of fabric was to gauge how long to make each streamer and we only had cheap grocery store bouquets on hand for the flowers.) Er, yes, that is wax paper on the plates you see. We didn’t want to handwash all of the plates for our mock-up shoot – we ate the cookies afterward.
A friend of the family has an old door with chipping light blue paint that we’ll be setting on the table for a unique surface top. Now just imagine those jars filled with colorful saltwater taffy, and all of those plates heaping with an assortment of cookies!
Speaking of those plates and china, that same family friend collects china to make beautiful mosaics, and she generously donated some pieces in our colors for the table. To get a variation of heights, we bought some glass candleholders from the dollar store and used heavy-duty tacky putty to secure the candleholder to the base of the plate. Ta-da, instant mini dessert stand!
I think it’s going to look delicious in an outdoor park setting once it’s all filled out with cookies, flowers, and a fabric garland.
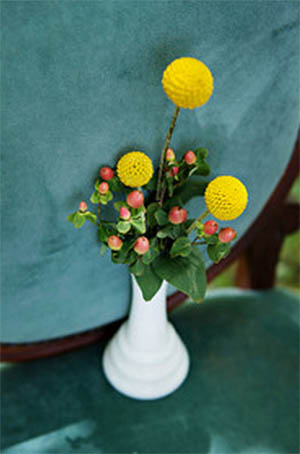 design by Modern Day Floral / photo by Lisa Kae Photography
Oh, and because it’s just too cute not to show: craspedia and hypercum will be in the two end bud vases, much like the one shown above.
Is anyone else having a dessert table? What details are you including in it? Do tell!
Suspended delights
Have you ever had one of those things that you knew you wanted to incorporate into your wedding, even before you were engaged or in a serious relationship? I’ve felt this way about paper lanterns. I’m not even sure where I first got the idea, but I know it was well before I was engaged. There’s just something about them that has me drooling… perhaps because they’re essentially suspended colorful drops of happiness.
 image via Elizabeth Anne Designs / Photo by Simply Jessie Photography
Early in my wedding planning, I started searching for sources to buy paper lanterns. This inadvertently led to me finding a plethora of images from real weddings that had the same idea, which I started collecting gleefully. I’m so glad that I hadn’t settled on colors yet back then (and thus hadn’t made any paper lantern purchases) because I soon discovered bunting flags.
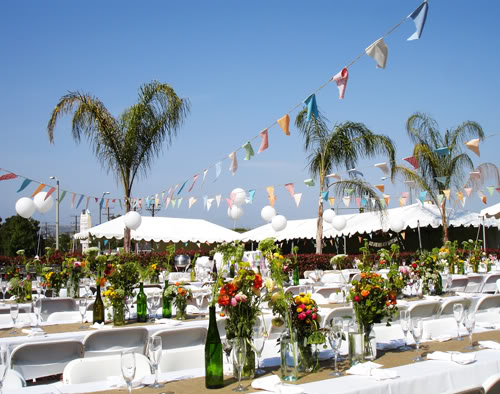 image via Oh Hello Friend / Photo by Christian Cruz Photography
And hanging flower balls.
 image via Every Last Detail / photo by Ashley Bee Photography
And string lights.
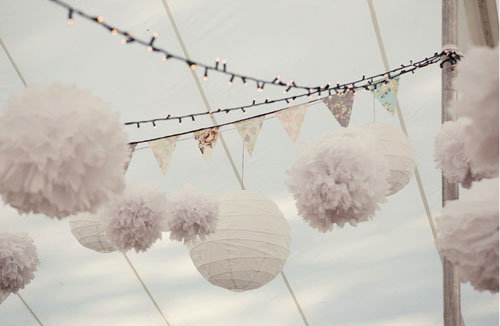
image via Poppytalk / photo by Kamp Photography
And tissue poms and paper garlands and streamers, Oh my! They were all so colorful and fun and absolutely delightful! I must have them ALL!
Hive, I’ve come to realize I can’t realistically have them all (as much as I’d like to). In addition to very high ceilings, there are strict regulations about not hanging anything from the walls at our reception venue. So that ruled out having buntings at every single turn. (I know, right? Don’t they know who I am?!) I’d love to add string lights to the reception, too, but unfortunately that’s not possible without having extension cords running all over the place – and consequently people tripping all over the place.
I’ve since made the smart decision of focusing on a few rather than the many: tissue poms with a few fabric and bunting garlands positioned in choice locations.
I knew I wanted to make the tissue poms myself since it’s quite a bit cheaper (and by golly I was convinced I could do it!). After scouring the internet for the best deal on bulk tissue paper, I found that nobody could beat the prices at PaperMart.com. I ordered four colors: light yellow, peach, aqua, and french vanilla. I’m not going to be using the french vanilla after all, so I’ll probably send that one back, but the other three colors were perfect for our color palette. See?
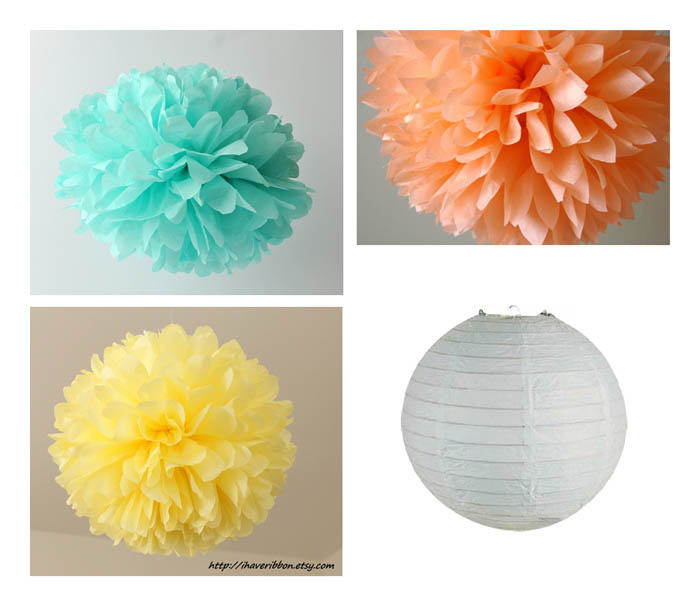
Wait a minute, Miss Bunting. What is that paper lantern doing in that photo? Well, now I’m beginning to consider adding some white paper lanterns back in to the mix but I’m just not sure if we need them or not. Oh, the decisions we brides have to make.
Have you ever had something that you loved, but couldn’t go over-the-top with because of budget or venue regulations? Did you end up going with it anyway? I persuaded myself to cut back because of both reasons, but now I can feel that “must-have” sensation creeping back up.
DIY: Faux Chalkboard Seating Chart
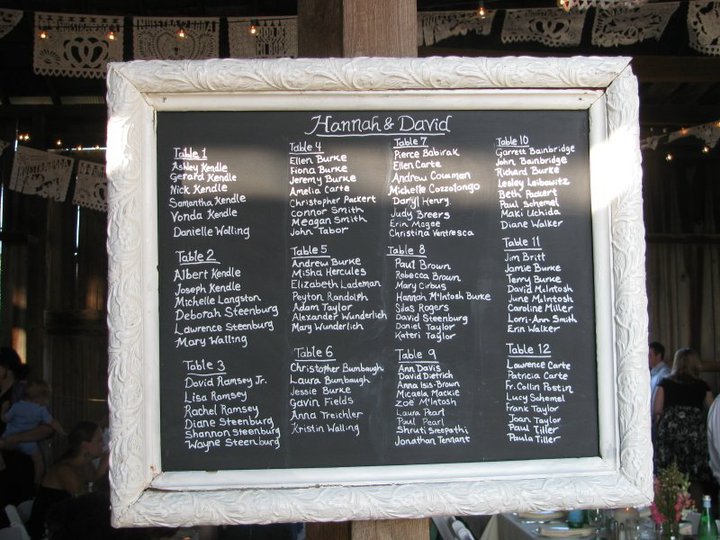 image via I Doux
I’ve wanted to incorporate chalkboards for awhile, and had settled on using one for our seating chart. However, my handwriting is not the best, and I couldn’t get the image of a smudged seating chart out of my head. Seriously, how do these people transport their chalkboards without smearing them? Oh, right, you can use a spray fixative (found at art/craft supply stores) to add a protective coating. Well, I still didn’t want to write out 150+ names, even if I could condense the couples into one line. So I thought to myself, why not print something to create a faux chalkboard? I work at a printing company, after all, so it’s perfect.
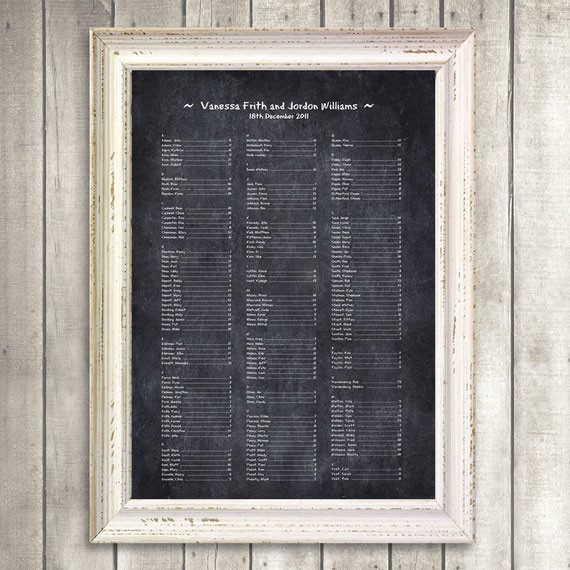 image via Idoityourself
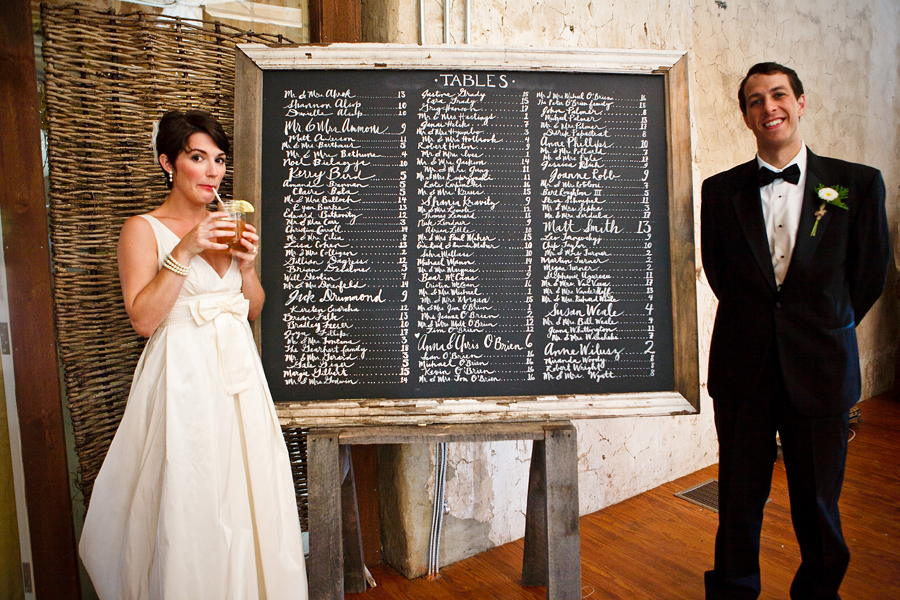 photo by Lorraine Daley Photography
The first step was to acquire a high-quality photograph of a chalkboard texture to use as a convincing background. I couldn’t find a good one from my free stock photography sources, so I did what any good DIYer does in such a situation: I made one myself. I didn’t have an actual chalkboard to photograph, much less a camera that could take a hi-def photo, so I took the lazy route and made one using a combination of photos and some Photoshop brushes. I then placed the image into InDesign, worked my magic, and ta-da, rough draft of a seating board!
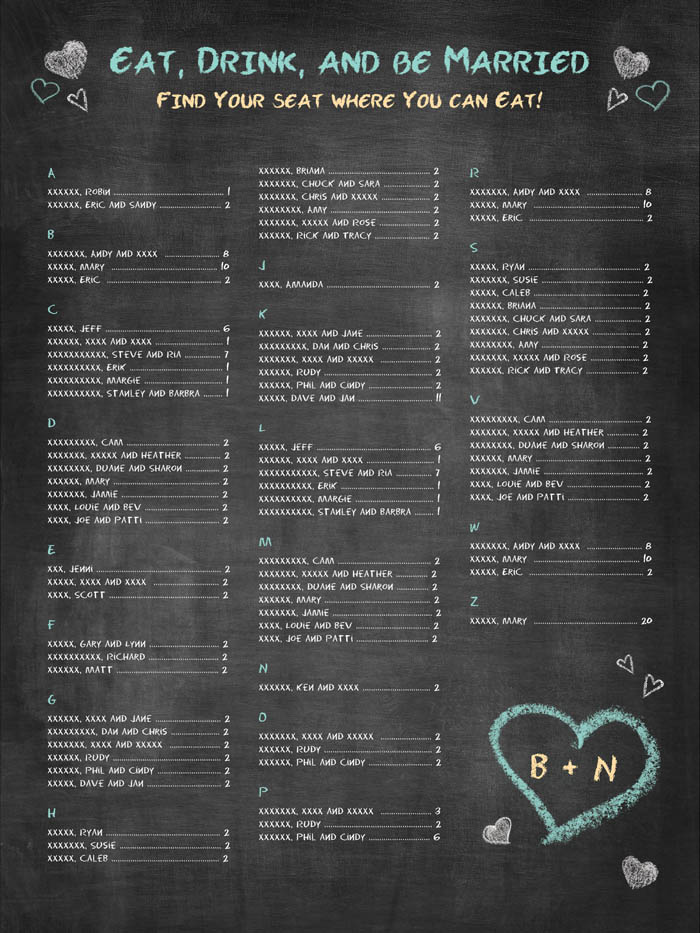
personal photo
Please excuse all the x’s (to protect privacy) and repeating table numbers (we haven’t actually figured out the assignments yet).
Here’s what you’ll need to create your own:
- Download chalk fonts for free: AllSkratchedUp and Eraser Dust
- Download my chalkboard texture (note: it’s a large file so I zipped it. You can use WinZip or 7-zip to unzip it)
- Adobe InDesign, Illustrator, or Photoshop
Step 1:
Choose your design program. I used InDesign, but Photoshop or a similar program will work as long as you can add type.
Once you’ve unzipped the chalkboard background file, open or place it in your program.
Step 2:
Adjust the size by re-sizing or cropping so that the image fits your board. I started with an 18×24 size document, so if that’s the size you want then you can skip this step.
Step 3:
Select your chalkboard font, font color, and start typing with the type tool! I used “AllSkratchedUp” for the header and “Eraser Dust” for the names.
Here is an image showing edges of my type boxes so you have a better visual of the layout structure.
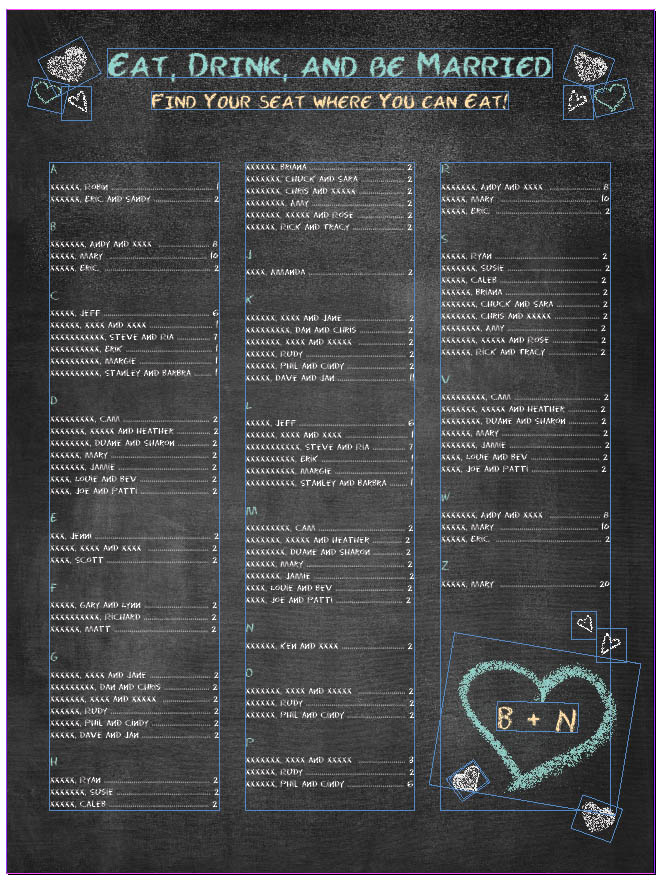
personal photo
It may take some time to play with the text so you get a size and layout that works for you. I recommend InDesign if you have it because you can use helpful features like overflowing text and object alignment. These things make it easier to position columns and all your objects neatly, but if you’re unfamiliar with that program or are using different software then you can just eyeball it or use guidelines.
The chalk hearts are additional images that I created to add some spark.
Tip: I do not recommend finalizing the positioning of all the names and numbers until you have a final guest count. It will save you time if you can at least plug in the names and fake table numbers so you don’t have to later, but don’t spend hours perfecting the positioning if you don’t have your seating assignments figured out yet. This is because if you add/remove one name or change a table number, it will change the positioning of the text (especially if you’re using multiple columns), and you’ll have to make adjustments all over again.
Tip: Leave extra room around the edges to accommodate the frame and give some visual cushioning space.
Tip: Using the aforementioned chalk fonts, the uppercase letter/initial is 28pt and the names are all 20pt. if you have less people, you can make these larger, but I wouldn’t go much smaller or it will be hard to read.
Tip: Print a portion of the board at 100% before sending the final to the printer, just to make sure that the type really will be legible at the size you chose. It doesn’t have to be a quality print, just something that gives you an idea of how big the type really is.
And, for those who don’t want to bother but would still like to have a printed faux chalkboard, you can purchase one at idoityourself.etsy.com
Step 4:
Once you have everything finalized, submit your high-quality file to a printer, let them print it, and then insert into your frame of choice!
Hair-spiration
 image via icanhascheezburger.com
Let’s talk about hair!
I have been growing my hair out for the past year and a half (pretty much since I got engaged) because I figured long hair wouldn’t limit me to how I wanted to have it done on the wedding day. It’s much easier (and cheaper) to chop it off at a later date if you decide to wear your hair short than it is to have to get extensions for a long ‘do. Granted, the road has not been easy. I have gone through many awkward periods where I wanted to have it cut short because I absolutely hated it. Just ask my MOH Bunting, who always talked me out of it like a true friend. But I stuck with it, and now I’m glad I did!
My hair is straight, very fine, and usually very flat. Like Miss Sparkler, I can never get it to hold volume for very long. Unfortunately for me, I am not a professional (or even a very good amateur) hair stylist so a DIY do is completely out. Fortunately for me, I will be having a professional to take charge, and I’m convinced that with the right products, some hair curling, and a lot of hair spray, we’ll be able to get my fine hair at a voluminous level to be able to pull off this:
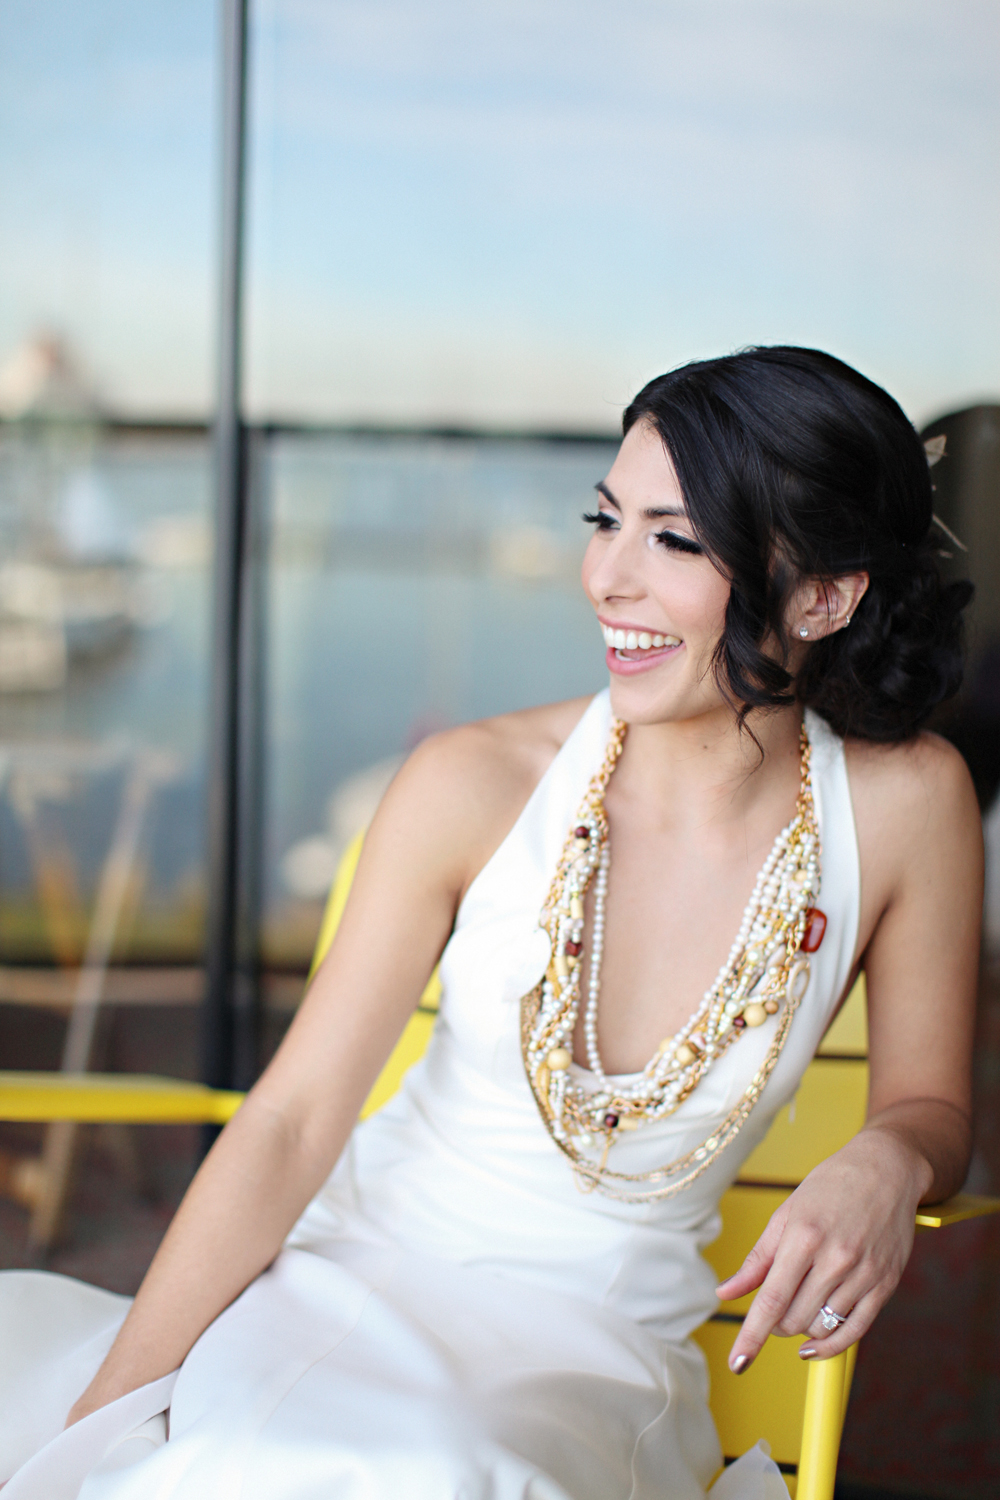 image by Troy Grover Photographers
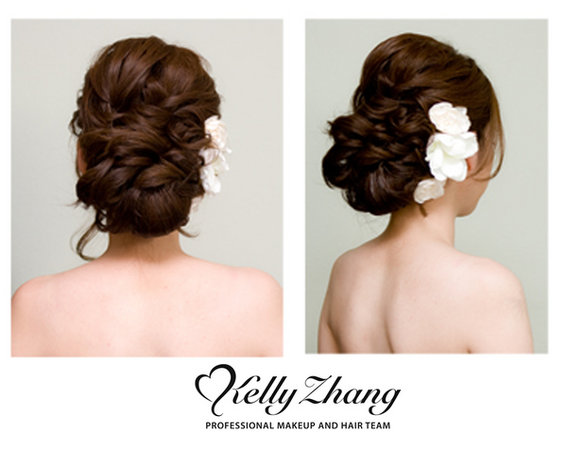 image via Kelly Zhang
 image by Percyhandmade
Helloooooooooooo perfect casual chic outdoor hairdo, my name is Miss Bunting and I want to be friends.
Who else is enduring bad hair days to get their dream wedding hair?
I shoe do!
Given my difficulties with finding shoes, I’ve been ordering and ordering pair upon pair from Endless.com. There have been some that were cute but too tight, some that were comfy but too weird, and some that were cute and comfy but just not right for my dress. And then there were these:
 image via endless.com
They are cute. They are comfy (as comfy as I’ll ever be in heels). They fit. They are light seafoam green-aqua (and a bit more colorful in person). They are perfect. There’s just one problem.
What?! How can there be a problem if they’re perfect, you ask? Well, you see, I was not looking for a heel that high. I was focusing on flats or teeny tiny kitten heels, because….. Mr. Bunting is the same height as me. And with heels, I’ll be taller than him. This personally doesn’t bother me, but Mr. Bunting doesn’t really want to look shorter than me on our wedding day. I can understand this, and I reeeeally tried to find flats that would work, but these are just. so. perfect!
Still, I was a little reserved with emotionally committing to them because my mind kept going back to poor Mr. Bunting…. until I tried them on with my dress. And they were perfect all over again.
I keep telling everyone that Mr. Bunting is just going to have to wear platform shoes. He only thinks I’m kidding, harhar. Okay, maybe I am kidding a bit, but we’ll probably end up getting him shoes that have a bit of a bootheel so the difference won’t be too drastic.
Is anyone else facing this problem of tall bride vs. short groom on the wedding day? Or maybe vice-versa? What is your solution?

